The clients tab allows you to add, edit, re-order, and group accounts for use in the plan scenario.

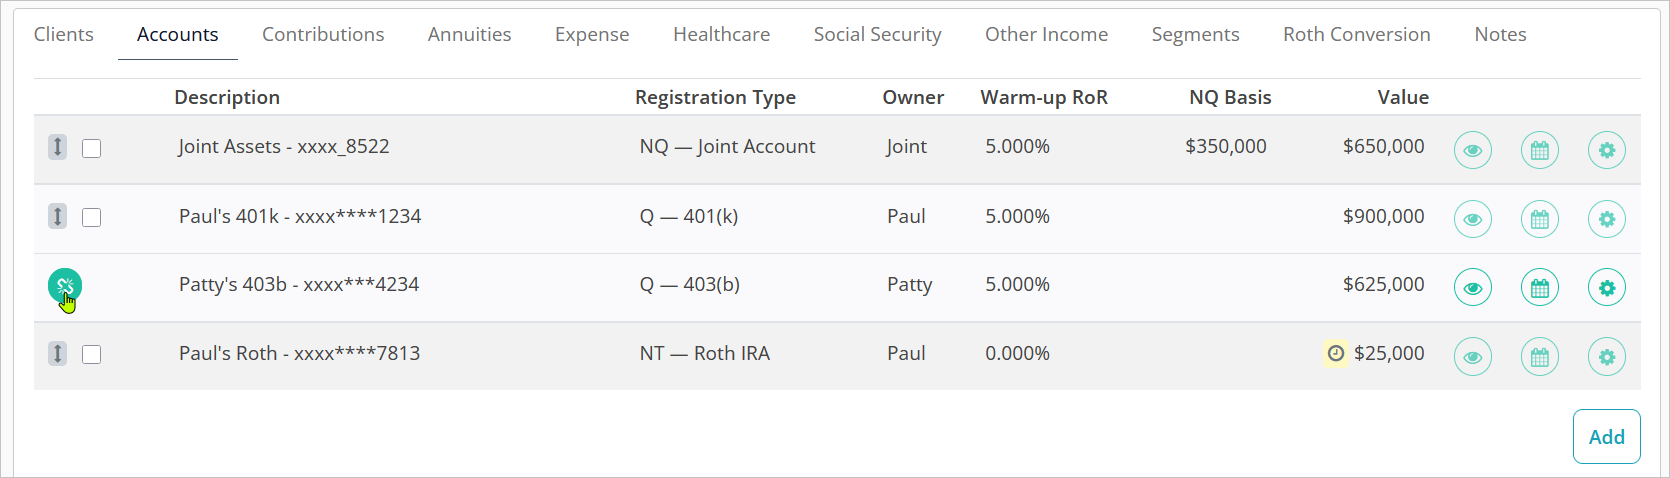
Each account will appear as a row with its Description, Registration Type, Owner, RoR (Rate of Return), and Value listed. The accounts can be imported from one of the platform’s data aggregation connections, or manually created as a “custom” account.
Accounts designated as any of the three annuity Registration Types appear in a separate table below. Annuities are not subject to segmentation, so they fall outside of the liquidation order of the upper table.
Accounts omitted from segmentation will appear in the Non-Segmented Accounts table below. These accounts are not subject to the liquidation order that drives allocation of assets to time segments. Non-Segmented accounts retain their own RoR throughout the plan rather than inheriting growth/distribution RoRs from segments.
Adding Accounts
Clicking the ADD button in the bottom right will bring up a window where you can create a new custom account. This can be useful if you are modeling a Roth conversion, but the client does not currently have a Roth account into which the proceeds would be invested.
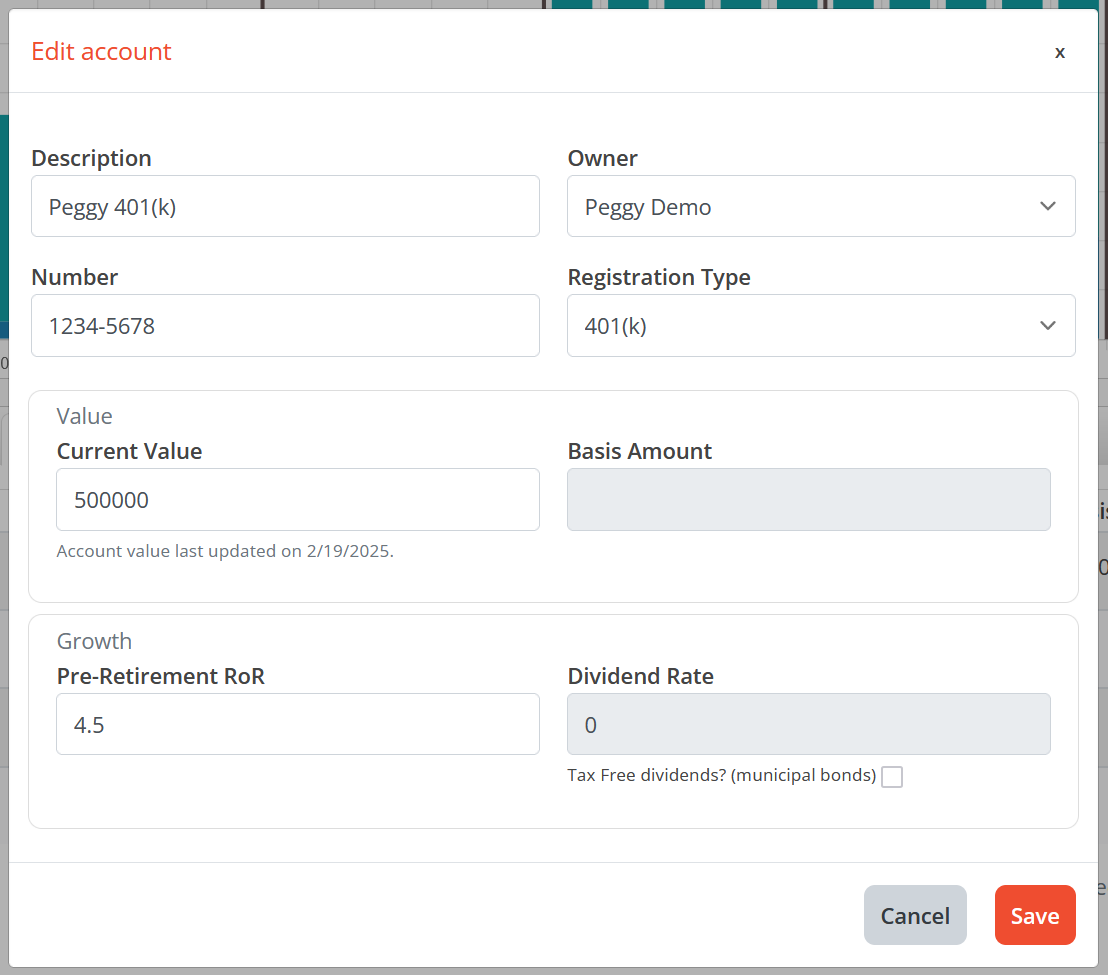
Description is name for the account and is free-form text input.
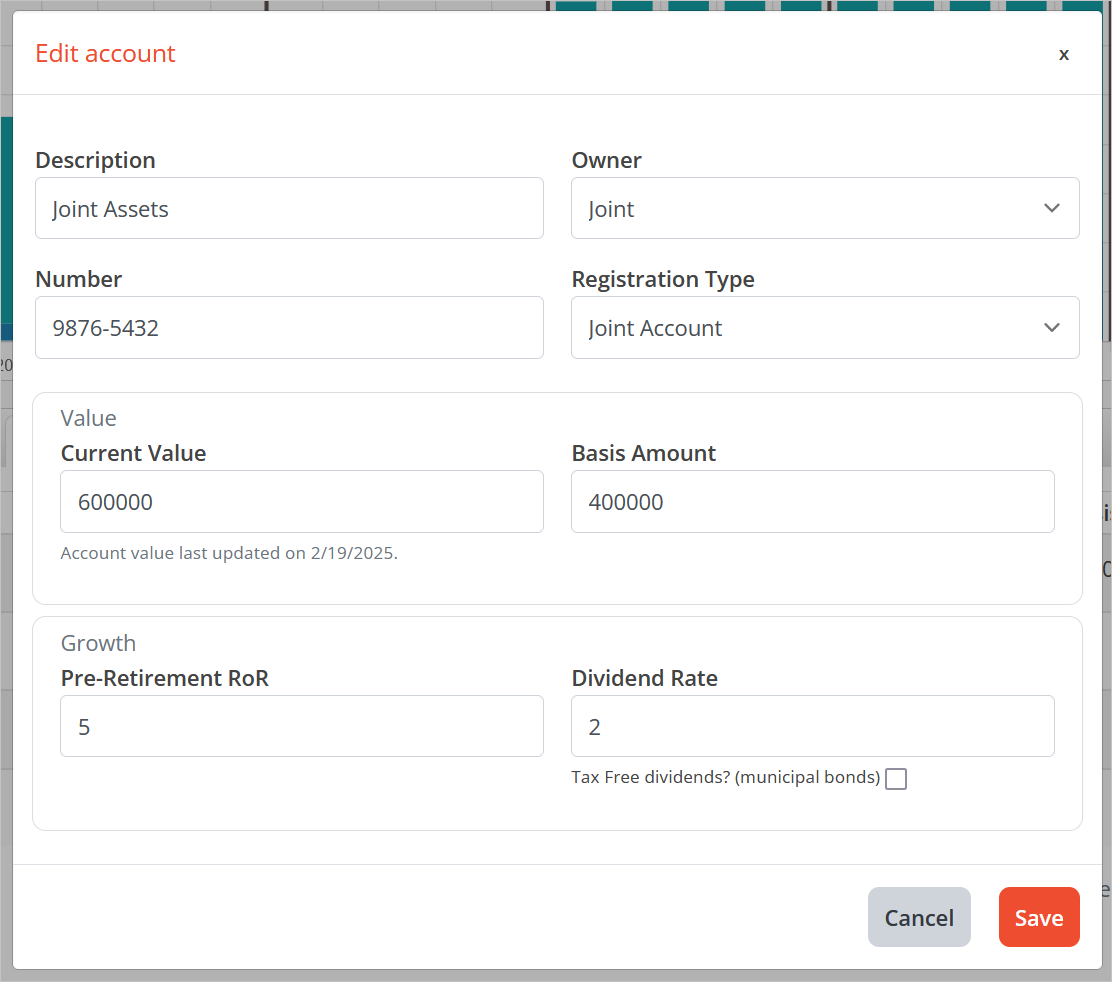
Owner will have an option for each client in the plan as well as Joint. Ownership is important in calculating RMDs on qualified accounts and will dictate the level of basis reset on non-qualified accounts transferring between spouses upon death.
Number can be used to hold redacted account numbers if known, or placeholders if not.
Registration Type allows for the selection of the legal classification of the account. Options to choose from are below. More options will be added in updates.
- 401(k)
- 403(b)
- 457(b)
- Annuity (Non Qualified)
- Annuity (Qualified)
- Annuity (Non Taxable)
- Company Retirement Account
- Individual
- IRA
- Joint Account
- Roth IRA
- Roth 401(k)
The Registration Type will dictate the tax treatment of the account during distribution, whether it generates RMDs, if it can be used as a source account for a Roth conversion, and whether it is subject to early withdrawal penalties.
Current Value should be the total value of the account across all holdings. If you’re creating the account as a destination for a Roth conversion or to use as a sweep account, you can set the value to $0.
Basis Amount is available for entry only on non-qualified accounts. This basis amount is used in the calculation of long-term capital gains when the account performs distributions.
Pre-Retirement RoR is the rate of return that will be applied to the current value between today and the date at which the account is allocated to segments and becomes available for use in distribution. For non-qualified accounts, this date is the plan start date. For qualified and non-taxable accounts, this date is the owner’s retirement date. Once an account is available for distribution, it’s growth rate will be dictated by the segments to which it is allocated.
Dividend Rate is the absolute portion of the Pre-Retirement RoR that is attributable to dividend income for non-qualified accounts so they cannot exceed the value of the Pre-Retirement RoR. Dividends are assumed to be 100% qualified and thus taxed as ordinary income. Dividends are credited at the end of each month after the growth rate has been applied. The cost basis will increase as dividends are credited and reinvested.
Tax Free Dividends is a checkbox that allows you to treat the dividends as 100% non-taxable.
Editing Accounts
Clicking the ⚙️ icon in the account row will open the editing menu. When editing a custom account, all of the same options are available as when adding. When editing a linked account that was imported, the account number and current value cannot be manually adjusted. The Current Value updates based on data fed through the account aggregation link and a last updated value will be shown to validate that the value is current.
Advanced Account Options
Clicking the 📆 icon in an account’s row will open the Distribution Dates & Rollovers window where you can assign settings that control additional account behavior.
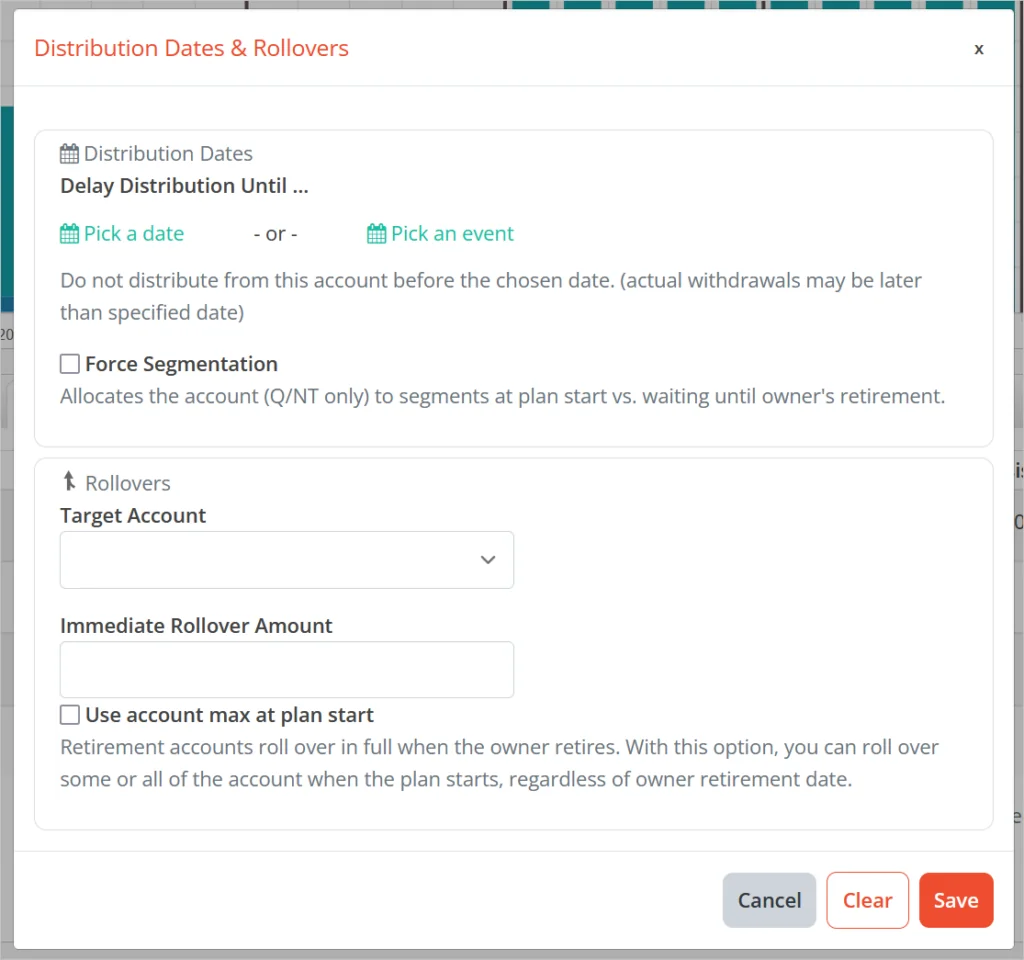
Delay Distribution Until allows you to choose either a specific date or a plan event prior to which this account will not be used for income distribution. For example, if you intend to use an account for a specific segment, you can delay distribution from this account until the segment start date. Even if this account falls ahead of others in the liquidation order, it will only begin distributing income when the specified segment begins.
Delayed accounts will still generate dividend income taxes if applicable for non-qualified accounts. You’ll see the account balance reflected in the Allocation and Balances views.
Delaying an account until the event “Plan End” forces it into the Surplus segment. Even if a plan incurs unfunded income, funds will not be withdrawn from the account to meet income needs. This update replaces the “Omit from Distribution” setting.
Force Segmentation will ensure that the account undergoes segment allocation at plan start, even if the account owner is set to retire at a later date. Tax-deferred and Roth type accounts will by default only be allocated to segments upon the owner’s retirement, but enabling this setting will override that behavior.
This setting can be useful when there are Q/NT assets owned by a client who is set to retire after their spouse which are necessary for income in the gap period between retirements.
When either Delay Distribution or Force Segmentation are activated, a 📆 icon will appear in the account’s row as an indicator.
Rollover Target Account is a drop down that provides you the option to model account consolidation at retirement. ERISA accounts can roll over into IRAs or Roth IRAs held by the same owner. IRAs can be combined with other IRAs, as can Roth IRAs. Non-Qualified accounts can consolidated using this option as well. For NQ accounts, there is no taxable event assumed upon consolidation and the cost basis of the accounts is combined – the assets are assumed to be transferred “in-kind”.
This feature can help clarify potential strategies for account consolidations, simplify segment implementation illustrations, and reduce the number of RMD obligations per client if all of their qualified assets will likely be rolled into IRAs at retirement vs. illustrating them as remaining in an ERISA account indefinitely.
When an account is assigned to roll over into another, a merge icon appears next to the source account.
Immediate Rollover Amount allows you to choose either a specific dollar figure or account max at plan start to roll into another account at plan start, even if the account owner is set to retire at a later date. Any assets remaining in the account when the owner reaches their retirement age will automatically roll over into the target rollover account.
This option gives you the flexibility to move assets into an account that is set to Force Segmentation at plan start and access them for income purposes while continuing contributions into the source account.
In the example below, Peggy is set to roll over all of her 401(k) assets into her IRA when Hank retires at the beginning of 2026. The source account balance transfers in full to the destination account and the IRA assets are immediately segmented and invested based on the current liquidation order.
Contributions to Peggy’s 401(k) continue until she retires in 2028 at which time they roll over into her IRA and are allocated to segments.

This results in a cleaner allocation scenario where the 401(k) assets are never directly allocated to segments, and there is only a small “(future)” IRA allocation which constitutes the ongoing 401(k) contribution assets via the second rollover at Peggy’s retirement.

Ordering Accounts
Specifying the order in which accounts should be withdrawn from is an important part of arriving at a tax-efficient income plan scenario. Modifying the liquidation order of accounts can be done by clicking and dragging them up and down in Accounts list. Once the account is dropped in a new spot in the order, the plan will automatically recalculate accordingly.
The account at the top of the list will be drawn from first with additional accounts following in descending order. Qualified accounts may be withdrawn from prior to the accounts ahead of them in the order if there RMDs are incurred before the preceding accounts are depleted.
Grouping Accounts
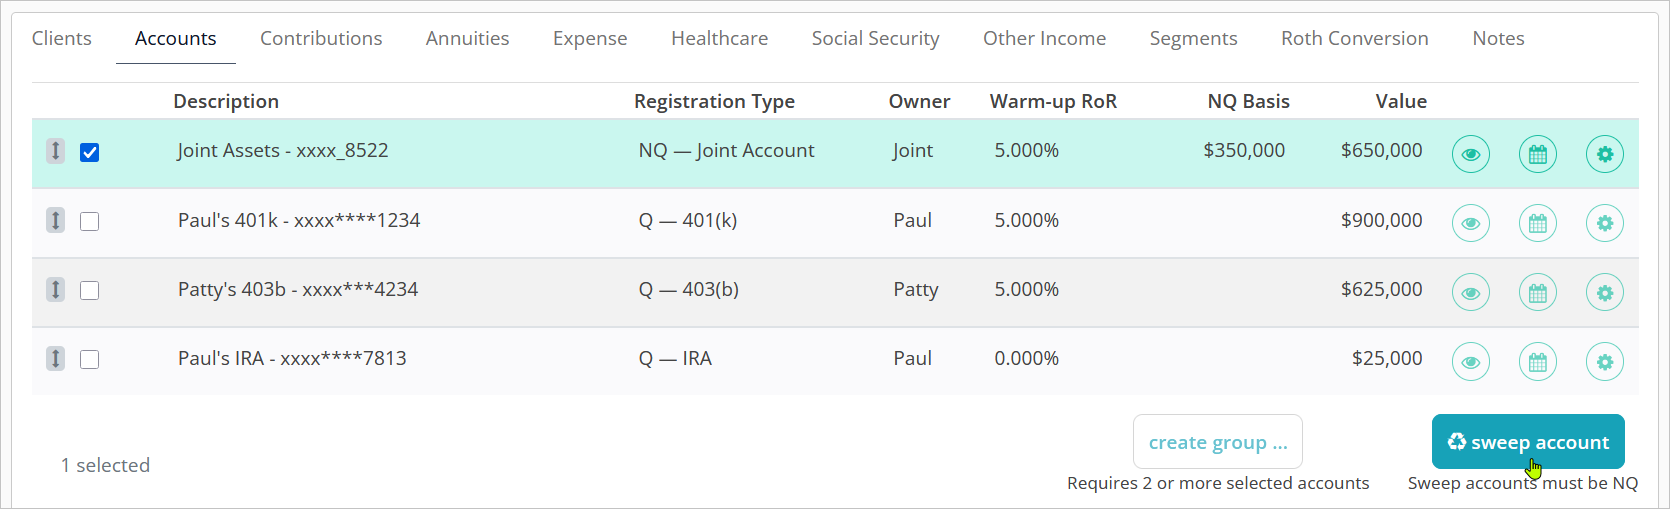
Accounts can be grouped in the liquidation order to force concurrent withdrawals from them. To group two or more accounts, click on their rows to highlight them in blue, and then click the CREATE GROUP button.

There are two options for settings the ratio at which assets will be withdrawn from the grouped accounts.
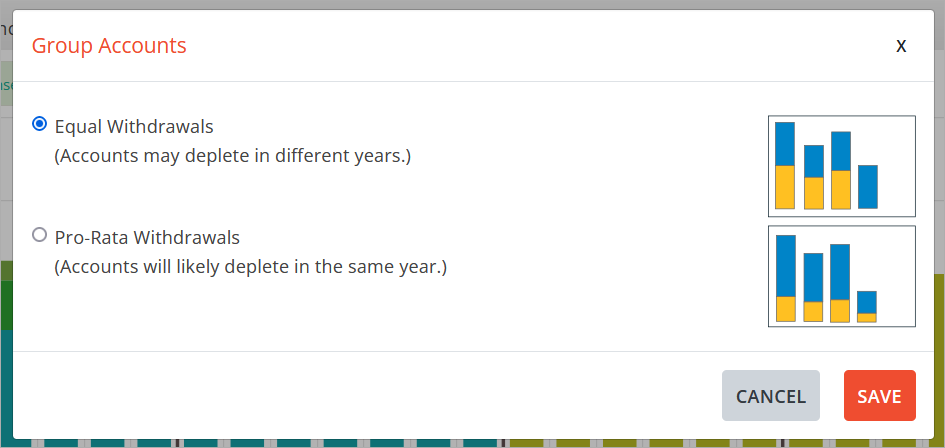
The first option is Equal Withdrawals which will force the exact same $ amount out of the account each year. This may cause the accounts to deplete in different years if they have unequal balances. For example, if two accounts are grouped as Equal and the gross income need for the year is $1,000, each account will have a gross distribution of $500.
The second option is Pro-Rata Withdrawals which will force withdrawals proportionate to the accounts value at the beginning of the year. For example, if two are group as Pro-Rata, with account A worth $10,000 and account B worth $15,000 and the gross income need for the year is $1,000, $400 would be drawn from account A and $600 from account B.
Grouped accounts can be clicked and dragged in the liquidation order as a group. To break the grouping, click on the broken 🔗 icon in the grouped account row.
Hiding Accounts
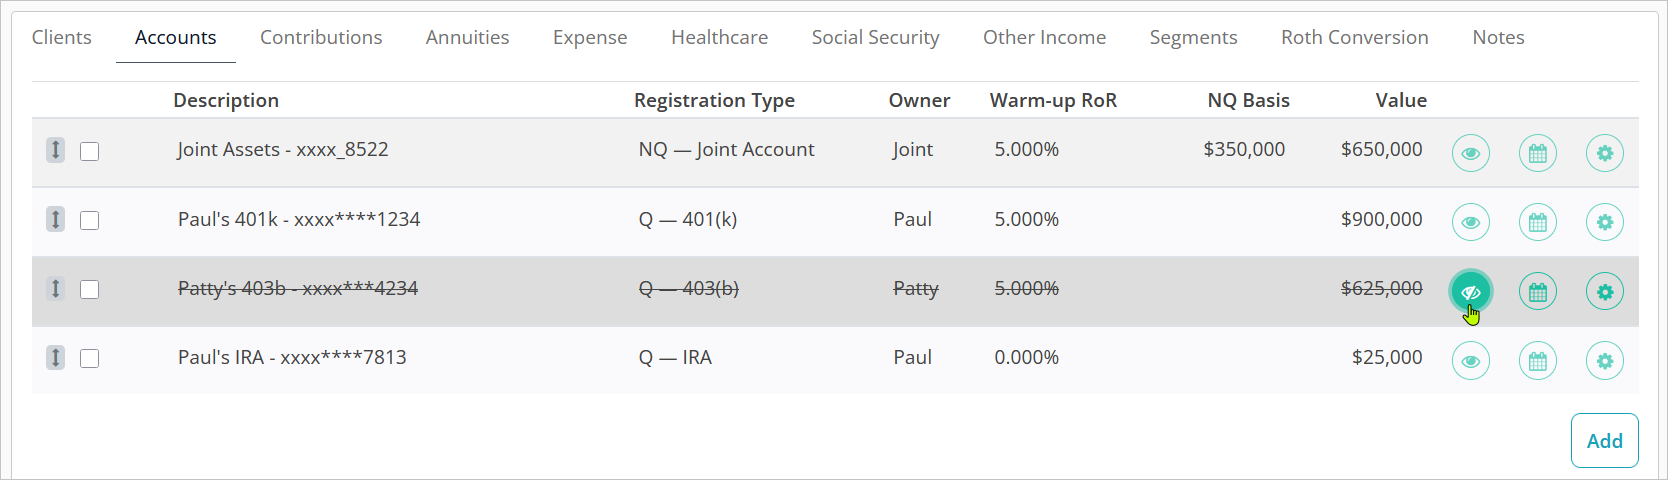
Clicking the 👁️ icon in the account row will “hide” the account from the plan scenario. Hiding will treat the account as if it does not exist, so the assets within it will not be available for distribution, nor will they generate any taxes or RMDs, and will not contribute towards the ending balance.
You will not see the account balance reflected in the Allocation and Balances views.
To indicate that the account is hidden, the row will darken and all text in the row will be in strike-through. Click the icon again to unhide the account.
Sweep Accounts
Sweep Accounts are used as the destination for excess income to be reinvested. They must be a non-qualified account. When a sweep account is assigned, after-tax excess income incurred will be invested in the sweep account immediately upon the start of the following year. The basis of the new assets will be equal to their value and adjust the overall basis of the account accordingly.
The Minimum Reinvestment Threshold at which excess income will be reinvested in the sweep account vs. treated as spent can be assigned in the plan Settings.
To assign a sweep account highlight the account row in blue by clicking on it and then clicking the SWEEP ACCOUNT button.
Which segment assets reinvested into the sweep account will be assigned to is driven by the order in which the account falls in the liquidation order.
To indicate that the account is set as the sweep, the ♻️ icon will appear in the account’s row. To remove the sweep status, highlight the account and click the SWEEP ACCOUNT button again.
Non-Segmented Accounts
Non-Segmented accounts are designed to allow you to prevent specific assets from being included in the account liquidation order and the subsequent allocation to segments. The order in which accounts appear in the Non-Segmented Accounts table has no impact on their behavior in the plan and there is no grab handle icon like there is in the segmented account table. As a result, non-segmented accounts will not appear in the Segments -> Allocations illustration.
Non-Segmented accounts be used much the way segmented accounts can. They can be the source or destination for rollovers, receive contributions, be used as the source account for annuity purchase premiums, assigned as the sweep account, and serve as the source or destination account for Roth conversions.
Distributions from non-segmented accounts will only occur if RMDs are required and no other like registration type segmented account exists, as well as if all segmented assets are exhausted and there would otherwise be unfunded spending. Distributions will appear in the Income -> Income (By Source) illustration rather than the Assets -> Withdrawals illustration. They will also appear in the Other Income (Gross) column of the Segments -> Full Plan Detail illustration, just as annuity income does.
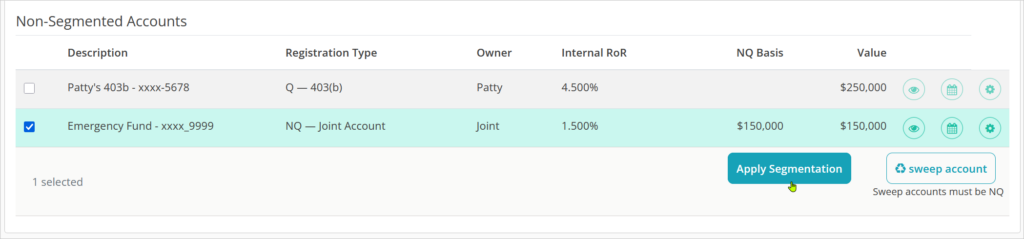
To move an account from segmented to non-segmented status, select it in the Accounts table and choose Do Not Segment.

It will now appear in the Non-Segmented Accounts table. To move it back into the segmented structure and liquidation order, select it and choose Apply Segmentation.
Non-Segmented accounts have their own Rate of Return assignment that is applied from today on through the end of the plan or the exhaustion of the account’s funds. Clicking the ⚙️ icon allows you to edit the assigned RoR as well as the other standard attributes of the account. If the account was assigned a Warm-Up RoR when segmented, this will be used as the Internal RoR when removed from segmentation, and vice versa.

Jump to the next controls tab: